Search This Blog

Monday, 20 July 2015

Halo Ships Build

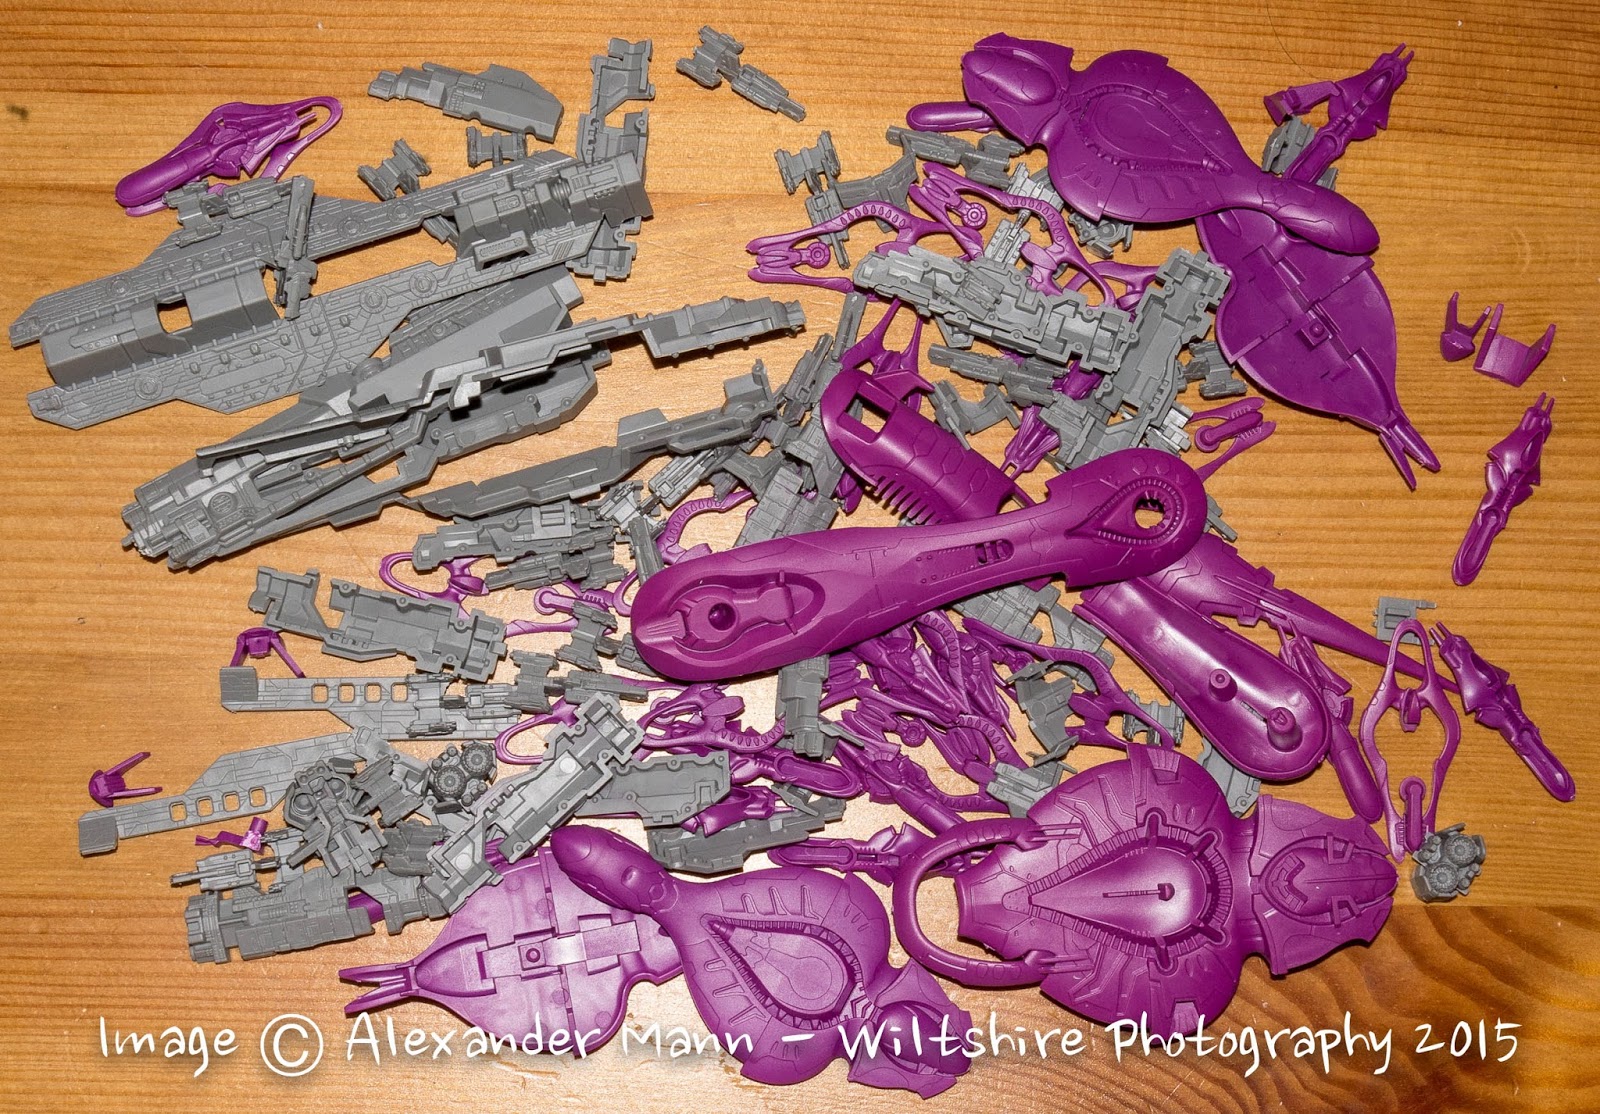
After the quick post up of the sprues, I got to making the ships...here are all the parts off the sprues (I DO NOT recommend you do this!!!)


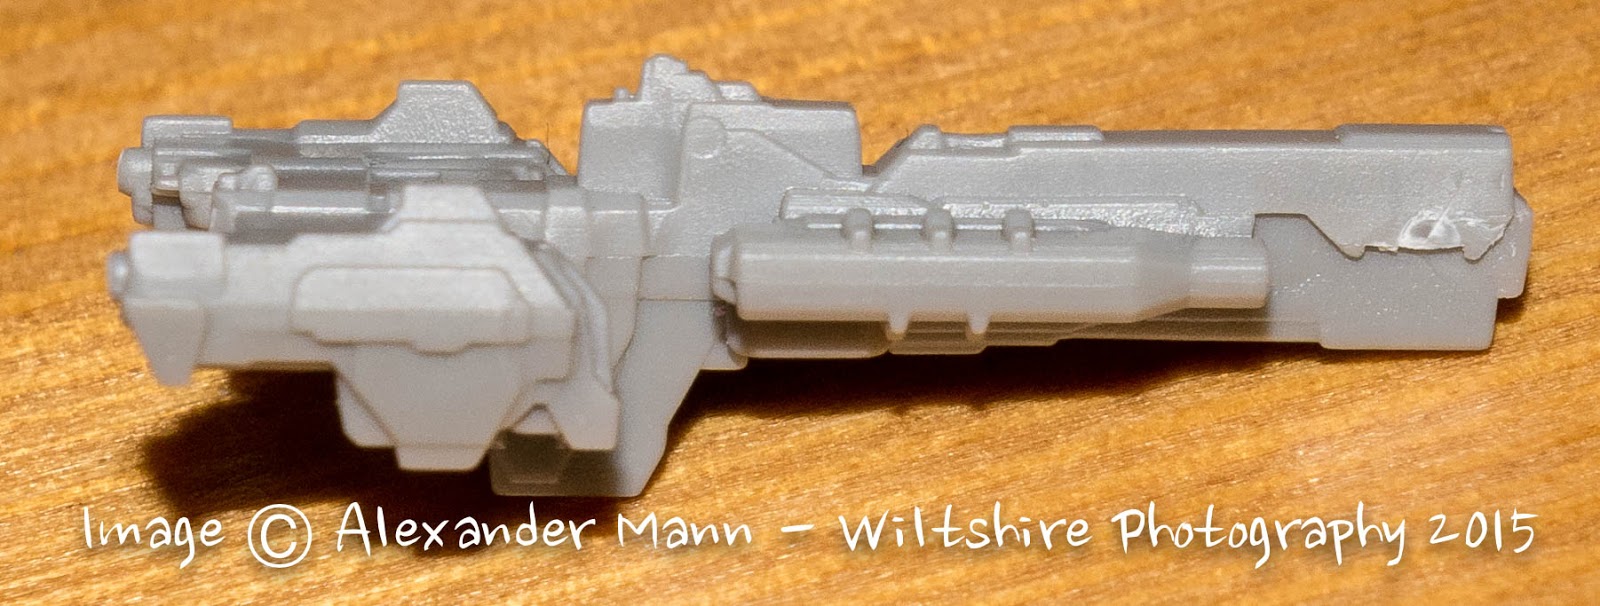
First up I'll start with the easiest ship in the set - the UNSC Paris-class Frigate. This is a simple snip off the sprue (I recommend side-cutters with a fine point) and clean up - I used a scalpel with 10A blade but you can use a hobby knife, file or sandpaper to clean up the attachment point, depending on your age, skill level and available tools.


Next up is the Covenant SDV Heavy Corvette. This is a simple two-part model, but it has great detail and the iconic shape is represented very well.


Points of note here are to be very careful with both the attachment points to the two little "tails" and the enclosed ring  - both need careful handling to prevent damage on detaching.

Then it's a matter of applying cement to either/both of the insert or raised areas - I used a regular liquid plastic cement with a precision applicator as it makes this job a lot easier.


The model then pops simply together, and hey presto;


It's a nice little ship, and also very indicative of why Spartan chose to go into plastic with this release - trying to build this in resin or metal would have been awkward to impossible, or cost prohibitive, at least. The colours of the plastics also bear mentioning - both these small ships demonstrate foresight in that those just wanting to get into the game without the attached hobby aspect can. Mine will, of course, see paint (via the trusty Badger 150 airbrush).

Next I looked at the Covenant CCS Battlecruiser.


This has four parts, and is a really nice model, both in the way it looks and how the parts have been split down. The main hull is a simple upper/lower split, which just requires gluing on the inside of the upper half to accomodate the lower piece


The front fins can then be placed within this - see the little pin on the first piece in the photo?


This fits into a little depression...


..like so. The other piece then glues in place onto both this and the main hull...


...like that - very neat! It's a great looking ship when complete.


Next is the UNSC Marathon-class Heavy Cruiser, which is one of the most complex models in the box, with 9 parts.


First is the inner hull, which is a simple matter to cement together


This then needs to be cemented into the outer hull, much simplified by the two cut-outs which show exactly how and where it fits


The rear engine assembly is then a simple add-on


As are the upper and lower add-ons, one going into this upper cut-out...


One into the lower double pin cut-out;


To complete the model then are the rear armour plates. These it is worth test fitting first (a practice I'd encourage throughout with any plastic model), but especially to ensure you're getting it right here, as one side (the lower) closes up together, the top does not.


So hopefully you can see there's a groove at the bottom of the rear of the model


 And a square depression on the side at the rear


These correspond to a pin and ridge on the armour piece, helping you orient it correctly


Once on the model, flip it to the other side and you can run cement along the bottom of the armour part as well as the pin and secure the other armour piece to both the armour and hull. Here you can se the armour meets up and is cemented together;


Whereas at the top there is a gap, as it should be!


When all together, its a lovely solid little ship! Once again, you can see how this would have been almost impossible to recreate the layered armour of this model in resin or metal.


Next is the Covenant Big Boy - the ORS Heavy Cruiser (and my favourite ship in the box). This is a seven part model;


The main hull builds as the Battlecruiser by cementing upper and lower sections


The "head and neck" parts of the ship have the rest of the parts - we start with these two;


Careful cementing on the inside edge of the parts...


...leads to a half-complete neck assembly. It also provides the tab for the rear of the second section to rest on.


A little more careful cement application completes this


It's then a very simple matter to glue in the second pair of fins


The assembly can the be flipped over to add the final head/neck piece


 This cements nicely in place as well, to create the finished piece. Again, it's difficult to see exactly how this could ever be created in resin or metal without some compromises being made.


All that remains is to bring the two sub-assemblies together. This is made very easy by the design of the union, which make it almost impossible to get this wrong or have the parts attach at the wrong angle etc - this is great foresight in tooling!


A bit of glue on the union area...


And hey presto!


This is a fantastic model - kudos to everyone at SG involved in creating and tooling this one!


The last ship is thus the Epoch-class Heavy Carrier of the UNSC, having eight parts (I forgot the engine block in the below photo)


Construction starts in a similar way to the Marathon, cementing the two inner hull components together


This then sits in the outer hull, which is not as intuitive as the Cruiser, but easy enough;


Looking a little like a future combat carbine at this point, it's time for the top hull piece, which drops over the rest of the hull assembly


Next up is the engine block, very straightforward...


And finally, the extra spaced armour at the front of the ship. Placement of this could be tricky...


If Spartan hadn't put this little slot into the front of the ship that the raised armour slat fits into. This provides a positive key for fit andlocks the front hull assembly together with the upper hull.


The Epoch is an impressive ship - and she will need to be for the challenge of the Covenant!


So what's the verdict on the Halo plastic? A very big thumbs-up! The recreation of the Halo ships is fabulous, and the detail levels are superb in what is, for Spartan, a completely new medium. I would say detail is equal to, or even better then, their resin products, which is a high accolade. The plastic is a nice consistency - hard, but yielding well to tools and not brittle, and responding well to standard off-the-shelf plastic cement. There was zero flash or miscasting in my examples, and the ships build up quickly with few issues.

A review of the complete boxed set will be up in due course, but I've a lot of Firestorm stuff to get through first...at least I covered the important things to me (the ship models) and it should give you a view on what to expect from this important factor to many of us.

See you next time!

Halo Ships First look

Now that the official release date is upon us, I wanted to look at the new plastic in the Halo box set from Spartan Games. So, without further ado, here they are;


These are the four different sprues you get in the starter box, plus the Base sprue, which I'm going to show and then skip over.


Yeah, it's some bases.

Now, moving onto exciting shiny things, let's look at each type of sprue individually;


As you can see for yourself, all the sprues are Copyright Microsoft and Spartan Games, making the provenance very obvious and direct. And why not? They are very nicely cast, crisp detail and reasonable attachment points - not massively think ones that will end up damaging parts on removal. The way the subjects have been handled is very nice, and the splits are quite clever - especially on the Covenant models. First impressions are very positive, and if this is indicative of Spartan's ventures into plastics, then more power to them!

Next post I'll actually build the models up so we can see some finished ships!

Wednesday, 8 July 2015

Zombicide!

Well here's a bit of a change of pace...Oscar's a big fan of zombie games like The Last of Us, and I'd heard a few odd things about Zombicide, so after selling some old bits and bobs I had no real use or intent for, I decided to give it a go...next day Amazon delivered a large parcel containing a rather sturdy box...


This feels like a quality product - the box is nicely produced and very solid. Opening it up we are greeted with...


 Taking out the rulebook...


 ...and then the counter sheet...


...reveals two boxes - one contains the "Survivors" (yes, the small box!), the other the zombies.


Taking these out reveals the player stat cards and the playing board tiles. All in all a full box that has been put together well and feels like a quality product. getting everything out and on the table looks quite impressive.


Taking a look at the miniatures themselves, they are really nice - this is Phil, a cop;


Very nicely sculpted, well posed and nicely cast, especially for a board game (though this is not aimed at your average family gaming audience, more the gamer/modeller market, so this is nice to see). The zombies, despite their number, are also nicely done. Here are a couple of the "walkers";


Again, nice poses and detailing. Next up is a "fatty";


And lastly an "Abomination" - you just get one of these bad boys (unfortunately my picture isn't great, sorry!);


The gameplay doesn't take long to get into, and the little starter scenario is useful to get a hang of the rules. Some bits we needed to jump back into the rules for clarity and some questions we couldn't find the answers to so did what we thought made sense (we were right about half the time, looking back!). After 40 minutes or so we were racking up a larger game to get into, and it was a ton of fun - absorbing 3 hours easily without feeling like that at all. Here's our game mid-session;


So verdict? It's a great game - there are very simple rules for the game, but the system is very elegant and surprisingly tactical, and does result in some very cinematic moments - Doug the office worker, for instance, plunging into a group of zombies with a chainsaw to clear the way for the group...survivors firing and making noise in a room to draw zombies one way, then ducking back through the building to escape out the other side....epic stuff!

The game is very clever in the way it escalates too...we were cowering at the beginning clutching pans and the odd pistol, fearful of more than a single zombie...at the end we were discarding katanas and wading into the fray, despatching fatties with machetes and Molotov's! Every survivor gains experience and skills for that experience over the game, and  the numbers and types of zombie that spawn are affected by the highest experience level of the survivors....very neat.

For less than £60 delivered, I can see it's going to deliver a lot of gaming fun, and it feels like money well spent...higher praise for a game it is difficult to give!

Sunday, 28 June 2015

Planetfall Directorate Recon Helix & Infantry Upgrade unboxing

The next unboxing is the Directorate, one of my current favourite forces in Firestorm. This time I'll start with the light infantry upgrade.


Box contents...


opening these yields a LOT of metal!


So there are three main elements - the sweeper teams, Field gun teams and the commanders. Let's start with the Field guns.


This is a nice resin quad rocket-launcher system, with 2 standard infantry - as there are 9 bases, that's 18 of the individual metal infantry...a large proportion of the metal content of this box.


The other major constituent of the metal content of the box are the Sweeper teams - in the Directorate that means hovering razorbots of death! These are immensely cool and really nice both conceptually and in execution. Swarms of these things flying across the battlefield at chest height cutting opponents in half is very Directorate!

There's a lot of metal spoor on these, so they take a while to clean up, but that's to ensure they get fully cast, so I've no real problem with that, they're not that much of a PITA.

The final part of the set are the commanders;


These take the usual form of three commanders and their bodyguards. The commander himself is very swish, and once again I'd love to see these in 28mm;


He'll be great fun to paint up :-)

Over then to the recon helix;


I was excited to see those Heavy Infantry robots....


No surprises in the box, two combat carriers, five of the new light tanks, infantry and Heavy Infantry. Unfortunately I forgot to take pictures of them in detail before I started painting them (hey, I was excited about them, OK?). So the pictures below are after washing, priming and dry-brushing.


The new recon is a lovely little thing, and very Directorate. The combat carrier is the same as previously, but I'll include it here anyway since I don't think I've put up a picture of it before fully made up (though again, mid-painting).


but my favourite models in the set are the sweeper robots. However disappointed I may be that they only have cyberweapons, they still look badass!


So that's all for this time folks, the Directorate releases are really nice and I'm looking forward to finishing them to add to my growing corporate acquisition forces! Let the good times roll!

Sunday, 21 June 2015

Planetfall Painting Demonstration

Having had a chat with a few people, I thought I'd try and do a quick(ish) painting demo video for a Planetfall mini - in this case a Dindrenzi Damocles Drop Pod. It was a bit of a learning curve from the editing side, but I think I came up with something reasonable in the end. The quality and resolution aren't what I originally output, because file size and upload speed wouldn't really allow it - so I apologise in advance for that. Anyway, have a look and see what you think....