Search This Blog

Showing posts with label paints. Show all posts

Saturday, 8 August 2015

Cleaning painting palettes

Acrylic paints are extremely popular, and for good reason - they have good adhesion properties, good coverage, sensible price points, low odour and toxicity, are water soluble and so on. Of course, when you're painting minis you frequently use small quantities of paint for specific tasks, then move on etc. If you're using a plastic palette, this means you often end up with this;


This is actually one of the cleaner examples of one of my palettes! Now some acrylics will obligingly come up in a single piece if you pull at them, others flake and crack, some others need real work. If you've little pieces anywhere, they will always find their way into your next lot of paint and you end up with flakes of different colours adhered to your models in a wash or something, usually in the worst place possible!

So to avoid this, I use a method I discovered by accident, which in retrospect is obvious - PVA glue.


Simply pour normal white PVA glue into one of your palette cups


Then spread liberally all over your palette tray. Don't be afraid to add more glue if you need to,


You should end up with something like this. Now all you need to do is find somewhere safe to put the palette and leave it until the glue dries. Overnight is usually fine, though if you've got a lot in the cups it can take 24h or so.


When it's dry, it will look something like this - it's not that easy to see here, since PVA dries clear, but you should be able to see the matt finish. At this stage you can repeat the glue application, which will result in a better and easier paint removal - the surface of the PVA grabs the new application and leads to a better, more even film.


Anyway, now all you need to do is peel the PVA glue off - the paint adheres to the PVA, and the PVA is flexible enough to pick up the paint and not flake off etc. Here you can see the PVA lifted up on the edge, pulling the paint with it.


Here its coming off across the palette...


First pass - don't necessarily expect one single sheet of glue/paint - this is easier when you've done a secondary application. Above you can see where isolated cells haven't pulled off, but you go back and pull these out separately - they come off in the same way.


And voila! One almost-new paint palette ready for further abuse! I hope this very simple trick helps you to keep your tools in good shape and continue to paint better models.

Tuesday, 26 November 2013

Crusties!

I mentioned in my Reading Warfare blog post that I was impressed with the GZG 15mm figures I saw, and I picked up a starter pack of Crusties, their District-9 inspired alien race. You get an awful lot of figures for £36, which presents the first challenge - how to prime them? After a wash in soapy water to remove any mould release agent, a water rinse to remove any soap residue, and a spell on tissue to dry them, I tacked them to a plank of wood with a tiny bit of superglue. This way I could prime the entire set without them falling over and getting paint-stuck to the wood, each other and generally causing an horrific mess!


These are just the infantry! The walkers I didn't tack down, but primed them in their componetn parts so they couldn't fall over etc. It meant a bit more fiddling around turning parts after they were dry, but was still very quick.

So now I had a bunch of white-primed figures, and as you can see above, it's difficult to see any detail (especially in flash-washed photos). The answer to this, of course, is to use a wash (like those cooked up from my last blog post) to pull out all the detail. I was a bit time-lmited for this, as I knew I was only going to be able to go a single squad, so I used diluted Vallejo ink in this case;


Much better! Using this wash as a pre-shade, I can now use a very thin paint to essentially "stain" the figure, and still retain shading. I'll see how this works out - I'll also paint some in base colours and wash them to see which is easier. The benefit of doing it this way is that the detail is much easier to see for painting.

The next thing I'm going to be after are some squad bases (possibly magnetic) and then a decent ruleset to use them with. Suggestions, anyone?

Monday, 25 November 2013

Washes

I was on the Spartan Games Community last week and someone was talking about being nervous on washing white. I posted about how I'd successfully washed The Destroying Angel, but it got me thinking about washes and how many people are beholden to ready-made washes from the likes of GW. Now some of these are, of course, very good, but people tend not to mess with them, using them as is or not at all.

Now if you were to use neat GW wash on a white model, it would definately be too strong. Here are four white primed Guardian escorts to show the effects of the wash - neat, diluted half, one-third and one-quarter strength;


So clearly at 100% the wash is staining the primer quite heavily, 50% reduces this effect and 33.3% removes it almost entirely. Going to a 1 in 4 dilution reduces the contrast considerably, however. The other thing I'm not keen about GW washes is they can get quite "gritty" and inconsistent

Here's the same thing done with Vallejo black ink;


The Vallejo ink has a much more even tone than the GW wash, and dilutes with better contrast (difference between the stained inlays and the flat areas which should remain as they were). Even the 25% dilution is useable here, especially if you were going to be using it on a ligth surface (like white or light grey). 

Now some time ago I read about Paynes Grey, which is much better for using on light colours, and tends to not have the "muddying" effect black washes can have. Artists use it a lot, and I bought a tube of soft body acrylic Paynes Grey some time ago - it costs about £5 for 2 US fluid Oz (~59ml);


A tube of this will probably last for many years - I've used hardly any of mine in almost 2 years. So to test how dilute you need this, we need a few bits and pieces - some white-primed Pilgrims, and a paletteto start with....


Now to stop the gloss effect you sometimes get with washes (like the GW ones), you need some of this stuff;


You probably won't ever use all of this! -250ml costs around £7 in the UK. You need some diluent, in this case water, and also something to break up the surface tension - you could use a solvent like IPA (though I wouldn't necessarily recommend that as use to much and you can lift you paint), a detergent (regular liquid soap, though this can foam) or PVA glue, which I'm using here (available anywhere for very little - I'm just using the stuff I use around the house anyway.

These 3 mixed in equal proportions give us our dliuent - very hard to see in this photo but the mixing tray does contain these mixed together.


Of course you can't just use the Paynes Grey straight from the tube, and if you try diluting it too quickly you'll end up with lumps, so the first thing to do is mix it 1:1:1 with Matt medium and PVA;


This gloopy mix can then be used with the diluent to make a series of dilutions, which I then used to wash a white-primed Pilgrim;


So you can see the most useful shades here are below 1:36, beyond that the effect is really too subtle. So, another set of dilutions giving a bit more insight into the 5-20 range;


So this produces some similar results to the 1-3 dilution of Vallejo in terms of the density of pigment and the staining of the flat surfaces. I'd say the useable range here was 10-20.

Now Paynes' Grey works really well for a wide range of colours, but some it doesn't work so well on, because it does haev a blue-grey cast. No problem, enter Transparent Burnt Umber;


This works well on browns, but mixed 1:1 with Paynes grey;


This gives almost equivalence to a "standard" wash like the GW or Vallejo washes above. The one on the end is a 1:40 dilution - you can see having the two colours together provide good contrast even at high dilutions.

So hopefully this will inspire you to try this yourself - spending just over £15 on these items will provide everything you ever need for your washes indefinately, and allows you to tailor your washes to what you need. Hopefully that will keep you popping the detail on your models for many a year to come!

Friday, 11 October 2013

The Return of the Directorate...Part 2

So I had a chance to go to Spartan Games for a second bout of v2 FSA, and was invited to bring Directorate along...so I thought I'd better finish some ships! As the match was around 700 points (I took 750 in the end), I was concentrating on the carrier, Tormentor cruisers, battleship and drones. I worked on the other ships as well, but didn't finish a lot of them - especially the frigates and cruisers. So, let's start with the mostly finished vessels;
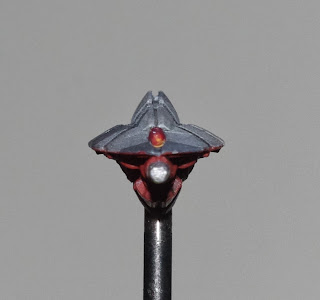
Firstly, the backbone of the fleet, which was the Judgement battleship, which additional shields to keep it alive for longer.


Next up is the carrier, which has always been one of my favourites


A pair of Nemesis destroyers;


And the pair of Tormentors - one finished (foreground, right) and one 90% of the way....


Next up are a squadron of Hostility drones, also almost complete - (rim "waterline" black stripes and engine glow to add). I still think they look like shrimps!


That's it for the force I took to battle, but I also finished up the Persecution;


Also in the pipeline I'm almost done with are the cruisers;


Mk II Cruisers and Heavy Cruiser;


Frigates;


And last (and least!) the Punisher escorts.


So almost there in getting my Directorate fleet fully painted and up to corporate devilment...bring it on!!!