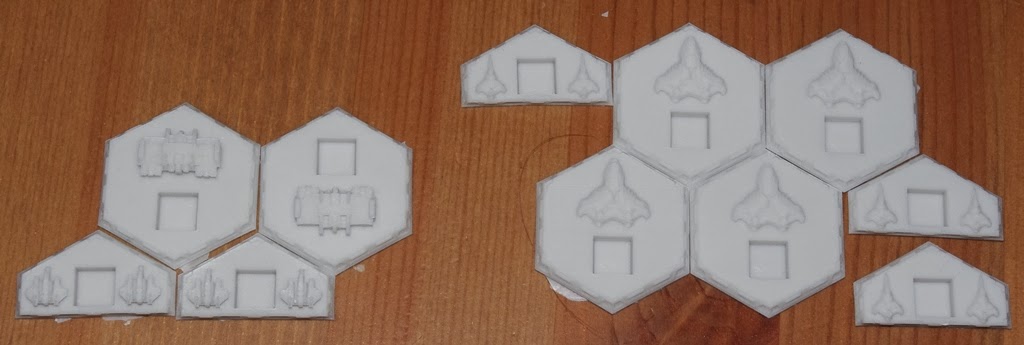
Sitting in my "to do" pile for quite some time has been a new Directorate patrol fleet, a pair of battlecruisers, carrier and my battle station. Add to that a couple of Executioner cruisers and that's a fair haul of ships. The reasons they've sat for so long are several, but included the need for my airbrush to have a deep clean and the fact that I was trying out a new came scheme for them using commercially available masks. This meant at least a three-stage spraying session, and two of them I'd already completed, I just needed that final one....
That background dealt with, I finally managed to get my airbrush cleaned a couple of weeks ago, and then get some time to spray them (as well as my recently purloined Dindrenzi planetfall Core Helix - more on that in another post in the future).
Now the Executioner cruisers I wanted to have in my old v1 splinter "dazzle" style, but I used the masks and the new colour scheme, so these are really v1.5 (I sense a Firestorm analogy here!). Now bear in mind these are the just after mask removal - no wash, shading, detail etc - just the basic starting point.
The masks aren't bad - where they work well they work very well, over large dips etc not so much, but I'm not concerned as these will be painted black in detailing anyway, so "blurring" over these areas doesn't matter. Overall they've come out pretty well, and should be a good "transition" stage into the new ships.
So, onto the new Patrol fleet...let's start with the battleship, a great sculpt:
Again, the masks work really well where the surface is smooth - so well in fact that it's difficult to spot them for removal in many cases - I found 5 that I'd failed to spot after taking this photo! The only issue there is that you can damage the finish trying to get them off. Anyway, next up are the cruisers:
The heavy in the middle is magnetised, and it was sprayed as individual sections. Finally in the patrol fleet are the Frigates:
I think these possibly came out best of all (or it may just be I really like the models!). Patrol fleet done, next up are the battlecruisers.
I've yet to take these bruisers out for a proper spin, but they look evil (in a good way!). We then have the carrier:
Still two separate halves, this caused the most trouble with its unusual shape and segmentation, plus generally uneven surfaces. Some of the masks came off mid-spraying, so the effect is not all I wanted on this ship. Still, I think it'll probably improve more than the other ships in detail painting for exactly those same reasons.
Last but by no means least is the Directorate battle station - possibly my favourite of all the stations (in fact, definitely so). Looking like an evil Federation Starbase, this thing is going to be great when it's finished!
That's just a quick update for now, I better get on and finish them!
UPDATE: After being asked what masks I used and how I did this, thought I should probably include these details!
So, the product I used was Anarchy Models' HD Stencils 20 "Mini Hexocam" as well as one of the other products for the splinter. They are very easy to use, basically you just prime your model (after appropriate cleanup), then spray in your first colour (as I use the grey primer as my base, I skipped the first spray step). The you apply the masks as you see fit - this takes more time with the hexocam as you really need to think ahead in terms of spacing, otherwise you'll end up with mis-matches or half hexes. You then spray your next colour, and mask again - the thing to remember is the colour you just sprayed is ONLY going to show up on areas you mask after spraying it.
The other point to not is really make sure your models are well washed of release agent, primed well and you leave each coat to harden after spraying, otherwise you'll pull areas of the paint up when you remove the masks (a couple of mine have small areas where this has happened, but that may be because I left mine on so long - another thing you should avoid if at all possible!).
A nice extra with the masks is that you're also supplied with some negative masks to touch up or add more detail - so for instance on the carrier where I had some masks come off and I'm left with areas of dark grey I might not want, I can use these to add some lighter hexes over the top. Just remember to mask the areas you DON'T want spraying too!
Hope that covers it - anything else, just ask!
Search This Blog
Showing posts with label Battle Station. Show all posts
Sunday, 18 January 2015
Directorate 2.0
Labels:
Abraxas,
airbrush,
Battle Station,
Deterrent,
Directorate,
Dominance,
Eliminator,
Executioner,
Firewall,
Liquidator,
mask,
modelling,
painting,
SG,
Spartan Games,
Subjugator
Sunday, 22 December 2013
Battle Station Construction Part 2 - Relthoza
So I've not been idle the past few days in an FSA way (as well as finishing Christmas shopping, watching crap TV with the kids and eating too much of the wrong sort of stuff), principally in getting the most complex of the battle stations put together - the Relthoza Weaver class. Now because this is a three-layered structure, it'd be pretty difficult to paint some parts of it when complete, so the first job was to get the parts painted to a level where it being in one piece wouldn't hinder completion.
Parts ready, I looked at the best way to put the station together. Now I'd had much head scratching initially on how this beast is made, but after figuring it out it's not actually as difficult as you might think. Essentially the acrylic struts need to go onto the structure first;
However, doing this would have made the other side difficult, so the easier way was to attach the struts to the side pods, like so;
The whole assembly could then be added to the main body thus;
Which just left a repeat for the other side;
Following by adding this to the main body.
All of this was done simply with superglue. When dry, the bottom piece then goes on, locking the other elements solidly together.
The station is then complete, ready to defend Relthoza installations across their territory.
Of course, I need to complete the painting, but she's 85% of the way there, and still suitable for gaming purposes if I don't quite find the time to finish off those last touches before my next game!
Saturday, 21 December 2013
Battle for Valhalla has arrived!
An enormous parcel arrived today from the Troll Trader. Under the 4" layer of bubble wrap (you could have dropped this off a building and it'd have been ok!) was the rather large and heavy (1.8kg) Battle for Valhalla boxed starter set. This is considerable larger than a standard Patrol Fleet (probably about twice the size, which would make sense as the set contains effectively two Patrol Fleets), but comes in the same double-walled cardboard box and sleeve format we've seen become the SG standard over the past 6 months or so.
On the cover is a decent photo of the fleets and station, and on the reverse of the box is the usual contents of the box;
A quick opening of the box shows the box is absolutely packed to the brim;
Unpacking all of this from the box you really appreciate how much is in there!
So in addition to the ships, the station (complete with acrylic parts) and rulebook, we also have two sheets of asteroids, two token sheets, two battle logs, resin SRS tokens, two bags of dice - one standard and one tiny (for the SRS tokens) - and finally the Battle for Valhalla scenario book. It covered a good section of our kitchen table!
OK, taking a closer look at the resin, let''s start with the station. This is a single-piece resin casting, together with the acrylic parts. The single-piece resin is a nice casting, and a fair size;
There are some differences between the top and bottom, but you'd be forgiven if you missed them, they're pretty subtle.
Turning our attention to the other Terran ships, the one that interests me most is the new Tyrant-class. I like the homage to Hawker and their designs, together with the more traditional Terran elements - it's a nice blend of fluff and design. It gives the feel of a solid, chunky ship, which (with its multiple shields) it is!
It looks good from top or bottom, and fits together very well (the three main elements above are only placed together) - the insert and vertical "fins" on the hull are included in the accessory pack bag, together with the flight inserts for the other ships.
Next up on the Terran side are the regular cruisers. These are also really nice castings, and come in two distinct pieces. There are no heavy cruiser upgrades in the Battle for Valhalla set, so these are all standards. As others have mentioned, each ship has two inserts which are just the right size for 3mm magnets, allowing you to magnetise them, which is a great feature.
Finally on the Terran side are the all-new resin frigates. These are unmistakably Terran, but I like them much more than the old Pilgrim.
For the Dindrenzi, the big-hitter of the set is the new Praetorian, a monstrous vessel cast in three main pieces, a main central hull and two drive sections. In addition are the gunracks, bridge, and engine inserts.
Onto the cruisers, these are again three-part castings following the same vein as the battleship.
The Dindrenzi ships finish up with the three frigates, which are very nice single-piece castings
The other resin pieces are the SRS tokens, and there a whole bunch of these - a lot more Terran than Dindrenzi, which I presume is down to the wing capacity of the station.
Wednesday, 18 December 2013
Battle Station Construction Part 1
After receiving the Battle Stations with my v2.0 rulebook (one of them, anyway!), I thought I'd strike while the iron was hot and get them washed (to remove mould release agents), rinsed, dried and primed to put together.
Before priming, however, I needed to prepare the acrylic parts, punching out the in-fills from the struts etc. Having already broken one of the Relthoza acrylic parts, I was disappointed to find that one of the Directorate pieces had broken just being in the box, and I then broke one of the Sorylian parts whilst trying to remove one of the small inserts.
Now I was being very careful, and using a small metal modelling tool to push this out, yet it still broke. Given this was the first one I'd tried to remove, I wasn't hopeful about my chances of having any intact acrylic pieces left by the time I was finished - so I needed another way.
I remembered those moments from childhood when required to make a hole in a piece of card, we had to use a pencil with a backing of plasticine behind the card. What I needed was a support for the fragile acrylic whilst I pushed the bits through. I didn't have any plasticine, but what I came up with was Play-Doh (snaffled from my kids play box!).
Using this, I was able to push the cut-outs from the main pieces without any further casualties. It wasn't without its difficulties, some of the pieces were a real sod to get out, but at least it did the job.
What I will say is that I really don't like these acrylic pieces. They're horribly fragile, and I don't like the way the inserts aren't cut through 100% - it's not like I want to keep any of the little fiddly bits, is it? I'm not a great fan of the way they look either - they're functional, but I find their blank appearance too bland, especially when compared to the level of detail in the newer FSA models.
That aside, using the Play-Doh method meant I didn't have any more accidents, so I'd definitely recommend it to anyone else when using these pieces. I then primed the various stations according to their race (white for Dindrenzi, grey for Terran, Aquan and the top of the Directorate, red for the Relthoza and black for the Sorylians and the vertical acrylic bits of the Relthoza station). Here are the stations posed in various states of test-fitting;
Looking at many of the stations, I think at least partial painting of them prior to assembly is a wise idea, so I'll report back when I'm further down that road.
Before priming, however, I needed to prepare the acrylic parts, punching out the in-fills from the struts etc. Having already broken one of the Relthoza acrylic parts, I was disappointed to find that one of the Directorate pieces had broken just being in the box, and I then broke one of the Sorylian parts whilst trying to remove one of the small inserts.
Now I was being very careful, and using a small metal modelling tool to push this out, yet it still broke. Given this was the first one I'd tried to remove, I wasn't hopeful about my chances of having any intact acrylic pieces left by the time I was finished - so I needed another way.
I remembered those moments from childhood when required to make a hole in a piece of card, we had to use a pencil with a backing of plasticine behind the card. What I needed was a support for the fragile acrylic whilst I pushed the bits through. I didn't have any plasticine, but what I came up with was Play-Doh (snaffled from my kids play box!).
Using this, I was able to push the cut-outs from the main pieces without any further casualties. It wasn't without its difficulties, some of the pieces were a real sod to get out, but at least it did the job.
What I will say is that I really don't like these acrylic pieces. They're horribly fragile, and I don't like the way the inserts aren't cut through 100% - it's not like I want to keep any of the little fiddly bits, is it? I'm not a great fan of the way they look either - they're functional, but I find their blank appearance too bland, especially when compared to the level of detail in the newer FSA models.
That aside, using the Play-Doh method meant I didn't have any more accidents, so I'd definitely recommend it to anyone else when using these pieces. I then primed the various stations according to their race (white for Dindrenzi, grey for Terran, Aquan and the top of the Directorate, red for the Relthoza and black for the Sorylians and the vertical acrylic bits of the Relthoza station). Here are the stations posed in various states of test-fitting;
Looking at many of the stations, I think at least partial painting of them prior to assembly is a wise idea, so I'll report back when I'm further down that road.
Sunday, 15 December 2013
Battle Station Unboxing
Last week I was away for three days at an end-of-year sales meeting, to return to find my battle-station/rulebook pre-order had arrived...hooray! Opening the package and removing the rulebook (which I covered in the last post) left me with a box full of resin and acrylic;
Unloading the stash shows s what we have;
There's a surprising amount of laser-cut acrylic in the box, and it's not that obvious what belongs to what on first glance. Opening the baggies gives us the resin (and in the case of the Aquan station, a flight stand as well.
All the stations are two-piece resin affairs, with the exception of the Relthoza and Dindrezi, which are both three piece. There are no instructions, so assembly is a matter of studying the pieces and looking at the photos on-line. In most cases they are pretty intuitive - the Aquan one being most obvious (which is why it's next to the station in the picture). In the photo above, the Directorate acrylic is the blue piece, the Sorylians on the extreme left, Terran mid-bottom, Dindrenzi to the right below the Directorate blue pieces and the Relthoza having a very large sheet at the top.
Now you have to be very careful taking the laser-cut acrylic pieces out, and even more careful taking the cut outs from inside them. This is what I ended up with whilst trying to take out one of the centre pieces from my Relthoza parts;
So I'd recommend using a scalpel or similar, together with lots of care...the above breakage won't be that difficult to mend, but it's a pain. The Relthoza station is also the least intuitive to put together, it took 5 minutes of fiddling to work out exactly what is supposed to be going on.
Some of the stations are easy to test-fit together, the Terran, Sorylian and Dindrenzi falling into this category. Here they are;
They're a decent size, with nice detail, and finely cast with very little flash (you can see a little on the Dindrenzi station centre part above, but that's about as bad as it gets - a few seconds with a scalpel or file will see you right). Considering these are about the price of a standard cruiser each when bought all together with the rules, they represent excellent value, although (as I demonstrated) you need to be very careful in handling the acrylic.
I'll be getting these washed and primed ready for painting ASAP so I can get them onto the table!
Subscribe to:
Posts (Atom)